
This guide explains how install Veeam In the simplest way Suitable for beginners By explaining it step-by-step, in the order of clicks. So that you can install it without confusion. The examples in this manual use... Veeam Backup & Replication on Windows This is the most common usage pattern.
Step 1: Prepare the system.
Before beginning the installation, make sure your environment is ready.
Minimum checklist
- Windows Server or Windows 10/11 (64-bit)
- Administrator account
- At least 4 GB of RAM (8 GB recommended).
- Sufficient disk space for storing backups.
- internet connection
Things to check
- Log in to Windows with administrator privileges.
- Run Windows Update
- Restart the system if requested.
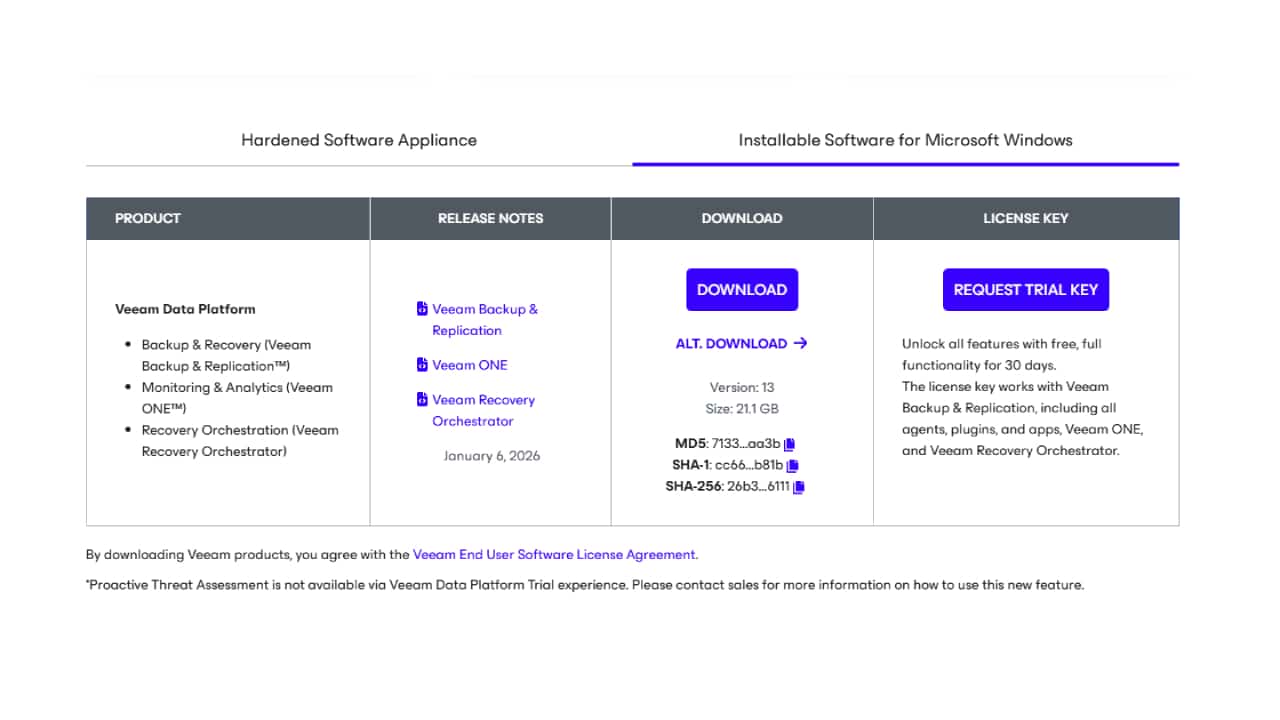
Step 2: Download the Veeam installer.
- Open a web browser.
- Go to the Veeam Download page:
https://www.veeam.com/services/auth/login - download file Veeam Backup & Replication ISO
- Save the file to your computer.
Once downloaded, you're ready for installation.
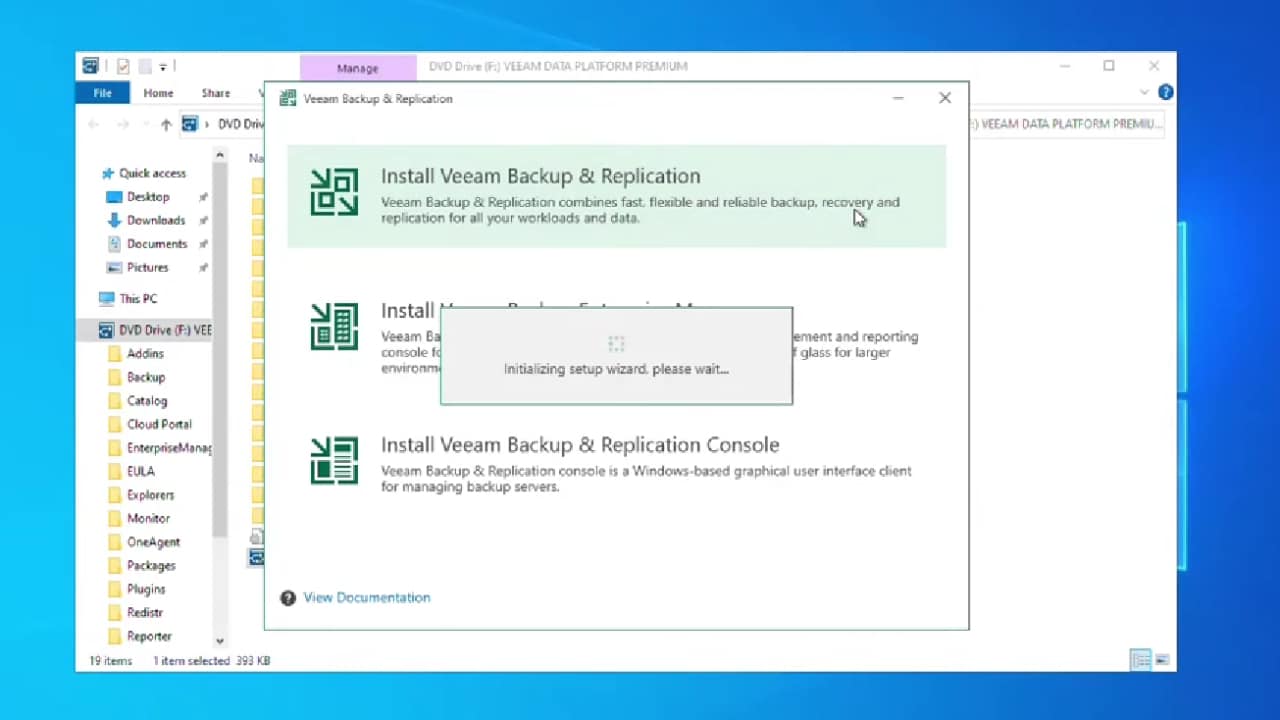
Step 3: Mount and launch the installer.
- Right-click the downloaded ISO file.
- Choose Mount
- Open the mounted drive.
- Double click the file. Setup.exe
The Veeam installation menu screen will appear.
Step 4: Start the Installation Wizard.
- click Install Veeam Backup & Replication
- Wait for the installer to load.
- You will see the Welcome screen.
- click Next
The system will proceed with the automatic installation process.
Step 5: Accept the Terms of Use.
- Read the License Agreement
- Mark that I accept the terms
- click Next
You cannot proceed without accepting the agreement.
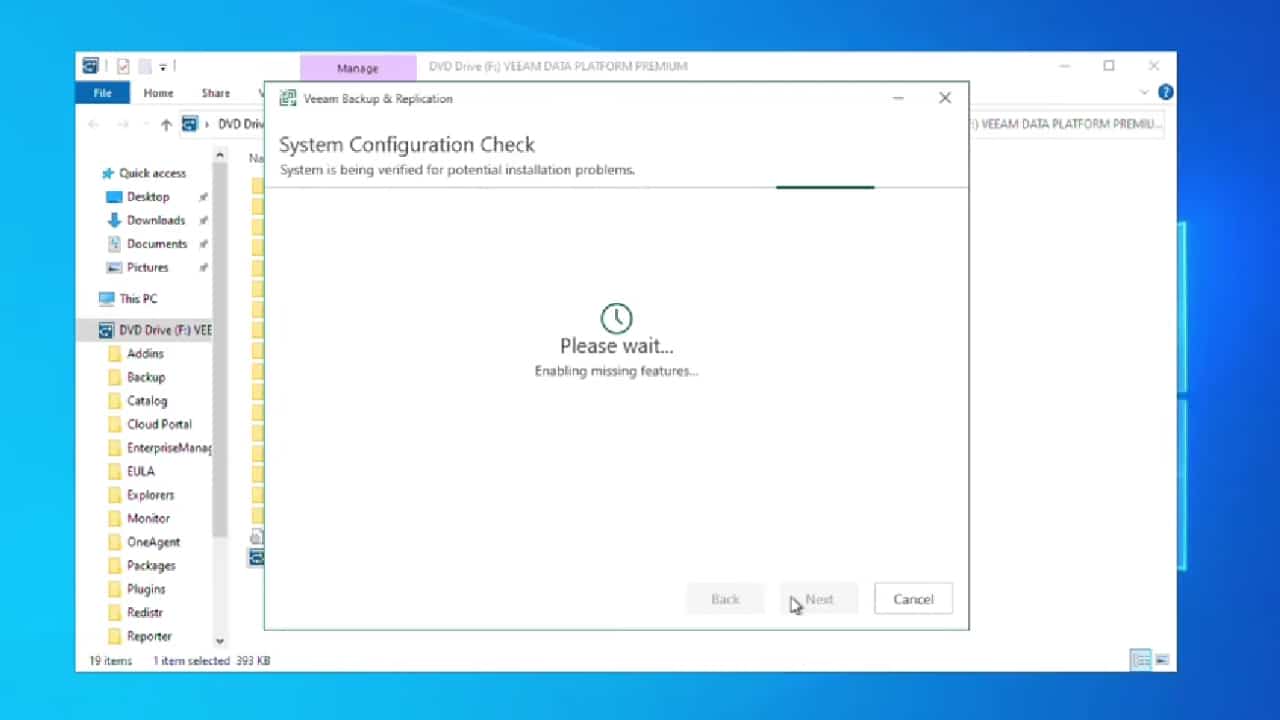
Step 6: Check system settings.
Veeam will automatically check for necessary components.
- Check required items
(e.g., SQL, .NET Framework, Visual C++) - If there are any missing items, click them. Install
- Wait until the installation is finished.
- click Next
This step helps Veeam function correctly after installation.
Step 7: Choose the installation method.
- Choose Install Veeam Backup & Replication
- Use all default settings (recommended).
- click Next
For beginners, using the default settings is the best option.
Step 8: Configure SQL Server
- Choose Use local instance of SQL Server
- Use the default database name.
- click Connect
Veeam will automatically configure the database.

Step 9: Set up your Service account.
- use Local System Account (default)
- click Next
You can change this setting later.
Step 10: Review the summary before installation.
- Check all the options that have been selected.
- click Install
- Wait for installation (approximately 5–10 minutes).
Do not close the installation window during the process.
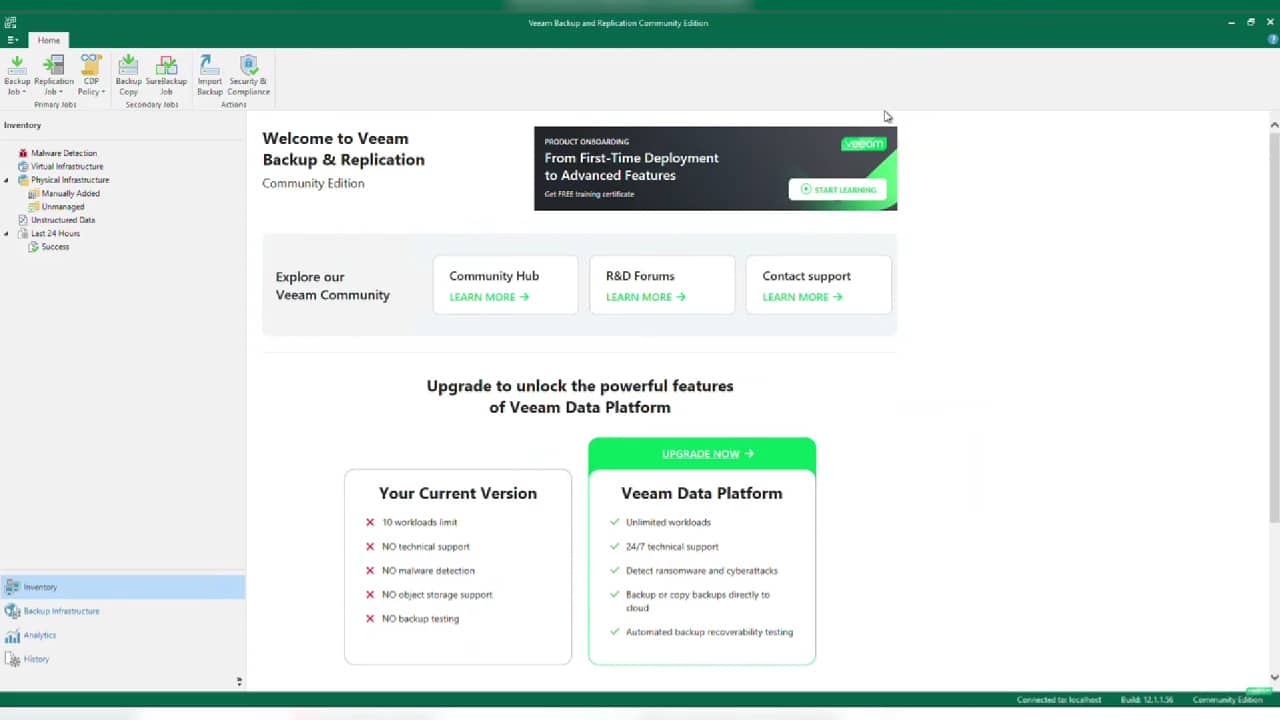
Step 11: Complete and activate Veeam.
- click Finish
- Mark that Launch Veeam Backup & Replication
- click Close
The Veeam console will open automatically.
Step 12: Initial setup after installation (recommended)
After the program is launched:
- click Backup Infrastructure
- Add a virtual server or system.
- Configure Backup Repository
- Create your first backup job.
At this stage, the Veeam system will be fully ready for use.
Installation summary
You have successfully completed the following steps:
- Install Veeam step-by-step.
- Use default settings safely.
- Prepare the system for data backup.
This method is ideal for labs, small businesses, and first-time users who want a quick, stable, and uncomplicated setup.